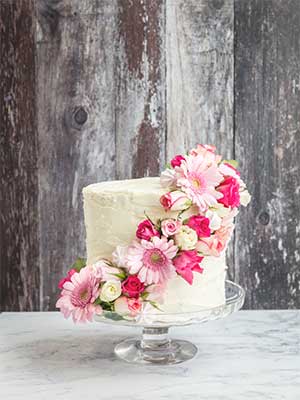
Over half of weddings now include DIY elements – whether it’s invitations, place cards, decorations, favours or even the cake itself.
The popularity of this trend comes from couples seeking a truly unique day that is personalised to them, thanks to the incorporation of those special “little touches” giving every element of the day a special tie to the bride and groom.
It also reflects a new movement, with couples wanting to amp up their wedding’s “wow” factor without having to blow the budget.
For many, food is one of the largest outgoings from their wedding budget. You’ve got the wedding breakfast, cake, favours, canapes and the additional evening meal. It also goes without saying that the bigger the guestlist, the bigger the cost.
 But this doesn’t have to be the case. The team at Panasonic Kitchen are firm believers that, by investing in a quality appliance, soon-to-be newlyweds can easily create home-made, great tasting food for their wedding, giving a truly personal touch to the big day.
All Panasonic appliances have been created to take the difficulty out of baking and cooking. The versatility of each product means users can create bread, cake (with gluten free variants), mains and side dishes, jams and spreads all with the touch of a button, thanks to the many automated features available on each appliance.
If you need any more persuasion, Panasonic Kitchen have shared two recipes; one four-tiered, vanilla wedding cake, as well as gorgeous, keepsake Strawberry and Champagne Jam wedding favours.
The full recipes, to help you start your including DIY elements to your wedding as well as top tips in creating them, can be found below.
To view the full range of Panasonic Kitchen appliances, visit John Lewis.
Wedding Cake
Dish: 4x 20cm (8”) deep loose bottom cake tins, greased and lined
Panasonic Accessory: Panasonic CF8 range
Ingredients
225g butter or baking spread
225g caster sugar
4 large eggs
225g self-raising flour
2 level tsp baking powder
2 tsp warm water
Filling
Strawberry jam
175g butter, room temp
350g icing sugar
1/4tsp vanilla extract
Method
Preheat oven on CONVECTION 180 °C.
Grease and line the tin.
Cream butter and sugar until pale and fluffy.
Add the eggs a little at a time beating well after each addition.
Sieve the flour and baking powder together and gently fold into the mixture.
Add 1-2 tsp of warm water until the mixture drops easily off the spoon.
Pour the mixture into the prepared tin. Place the tin on the base of the oven and Bake on CONVECTION 180 °C for 40 minutes or until golden and the top springs back when lightly pressed.
Remove from the tin to completely cool.
Repeat 3 more times to make 4 cakes.
When the cakes are cool carefully slice the tops to make an even flat surface. Spread the bottom of one cake generously with strawberry jam, then with one third of the butter icing. Lay the next cake on top and repeat. Finish the last sponge with the base uppermost to give a flat top.
Either fully ice the cake with a ready rolled icing or make another batch of the butter icing and lightly ice, leaving some of the sponge exposed for the naked cake effect.
Dress with fresh fruits and macaroons or fresh flowers.
*To create the butter icing, gradually beat together the icing sugar, butter and vanilla extract until combined.
Top Tips from Sammy Dell, Head of Small Kitchen Appliances at Panasonic
When decorating with fresh flowers that aren’t an edible variety, be careful to wrap the stems before inserting into the cake – this will avoid any sap seeping into the sponge.
When preparing your cake tins, make sure you grease evenly and all the way to the top, as this will ensure an even cake bake level.
Strawberry and Champagne Jam – Spread the Love Wedding Favours
Items needed: Sterilised jam jars, twine, brown tags
Panasonic Accessory: Panasonic 2522 Bread Maker
Ingredients
600g strawberries, hulled and finely chopped
400g sugar
The juice of 1 lemon
150mls champagne or prosecco
20g powdered pectin
Method
Place half of the fruit into the bread pan, then add half of the sugar on top. Repeat with the remaining fruit and sugar in layers until you have run out
Add the lemon juice and champagne
Sprinkle the pectin onto the ingredients in the bread pan
Select the jam menu and enter 1 hour 40 mins on the timer
When complete, leave to cool and then ladle the jam into the sterilised jars
Add some twine and a personalised tag as a finishing touch!


Add new comment